Posts filed under recipes

tea infused granola + yogurt = homemade goodness


Just made yogurt for the first time from scratch. It's so easy and tasty! Paired with homemade tea infused granola (recipe via Alice's Tea Cup Cookbook) and you have an amazing breakfast or snack. New Year, New Recipes.

Instructions:

(1) Heat milk to 180-190 degrees Fahrenheit or until bubbles start forming and milk steams. Heating in a double boiler on the stove will keep the milk from burning. If just heating in a pot, keep stirring the milk to prevent burning.

(2) Turn heat off and let the milk cool to about 115-120 degrees Fahrenheit. Thin out your starter yogurt with some of the warm milk. Either your favorite store bought brand or some of your last batch works fine. I used my favorite Greek yogurt. Use 2 Tablespoons of starter yogurt for every quart of milk you heated. Add this thinned mix to your batch of heated milk.

(3) Put the warm milk into a covered container. Swaddle the container with kitchen towels. Keep warm and still for about 4-6 hours or more till it sets. It can be placed in an oven with the light on to keep warm.

(4) Once set, place in the refrigerator to further firm as required. To make thicker Greek Style yogurt, strain yogurt through a cheese cloth & colander for a few hours in the fridge. The whey and lactic acid will drain out into the bowl.

(5) Serve with your favorite mix ins!

(image by: vivien chin)

Posted on January 5, 2013 and filed under recipes, restaurants & food.

homemade veggie pizza

Really delicious easy pizza to make.  Either use your own pizza dough or what's shown above is the Trader Joe's Garlic herb fresh pizza dough.

Toppings: roasted red peppers; artichoke hearts; spinach; kalamata olives; parmesan cheese; fresh garlic; basil; oregano

Bake at 425 degrees till done.  Enjoy!

An easy, tasty meal.  Colorful and beautiful too!

(image by: vivien chin)

Posted on March 18, 2012 and filed under recipes, restaurants & food.

quinoa tabbouleh salad

20120223-220603.jpg Made this new recipe for dinner. Delicious, light, and fresh. Good alone or as a complementing side dish. My first recipe with quinoa. Now to look for more!

Ingredients~ 2 cups water 1 cup quinoa, rinsed 1 cup tomato, diced 1 cup cucumber, diced 1/4 cup mint, chopped 1/4 cup green onions, chopped 1/4 cup lemon juice 1/4 cup kalamata olives, chopped 2 tablespoons extra-virgin olive oil (or more to taste if necessary) 1/2 teaspoon cumin, toasted and ground (optional if you don't like the flavor) salt and pepper to taste garlic powder to taste

Directions~

(1) Bring the water and quinoa to a boil, reduce the heat and simmer until the quinoa is tender and the liquid has all been absorbed, about 17-20 minutes and let cool.

(2) Mix the quinoa, tomato, cucumber, parsley, mint, olives, and green onion.

(3) Mix the lemon juice, olive oil, cumin, salt and pepper and toss with salad.

(image by: vivien chin)

Posted on February 23, 2012 and filed under recipes, restaurants & food.

yorkshire puddings

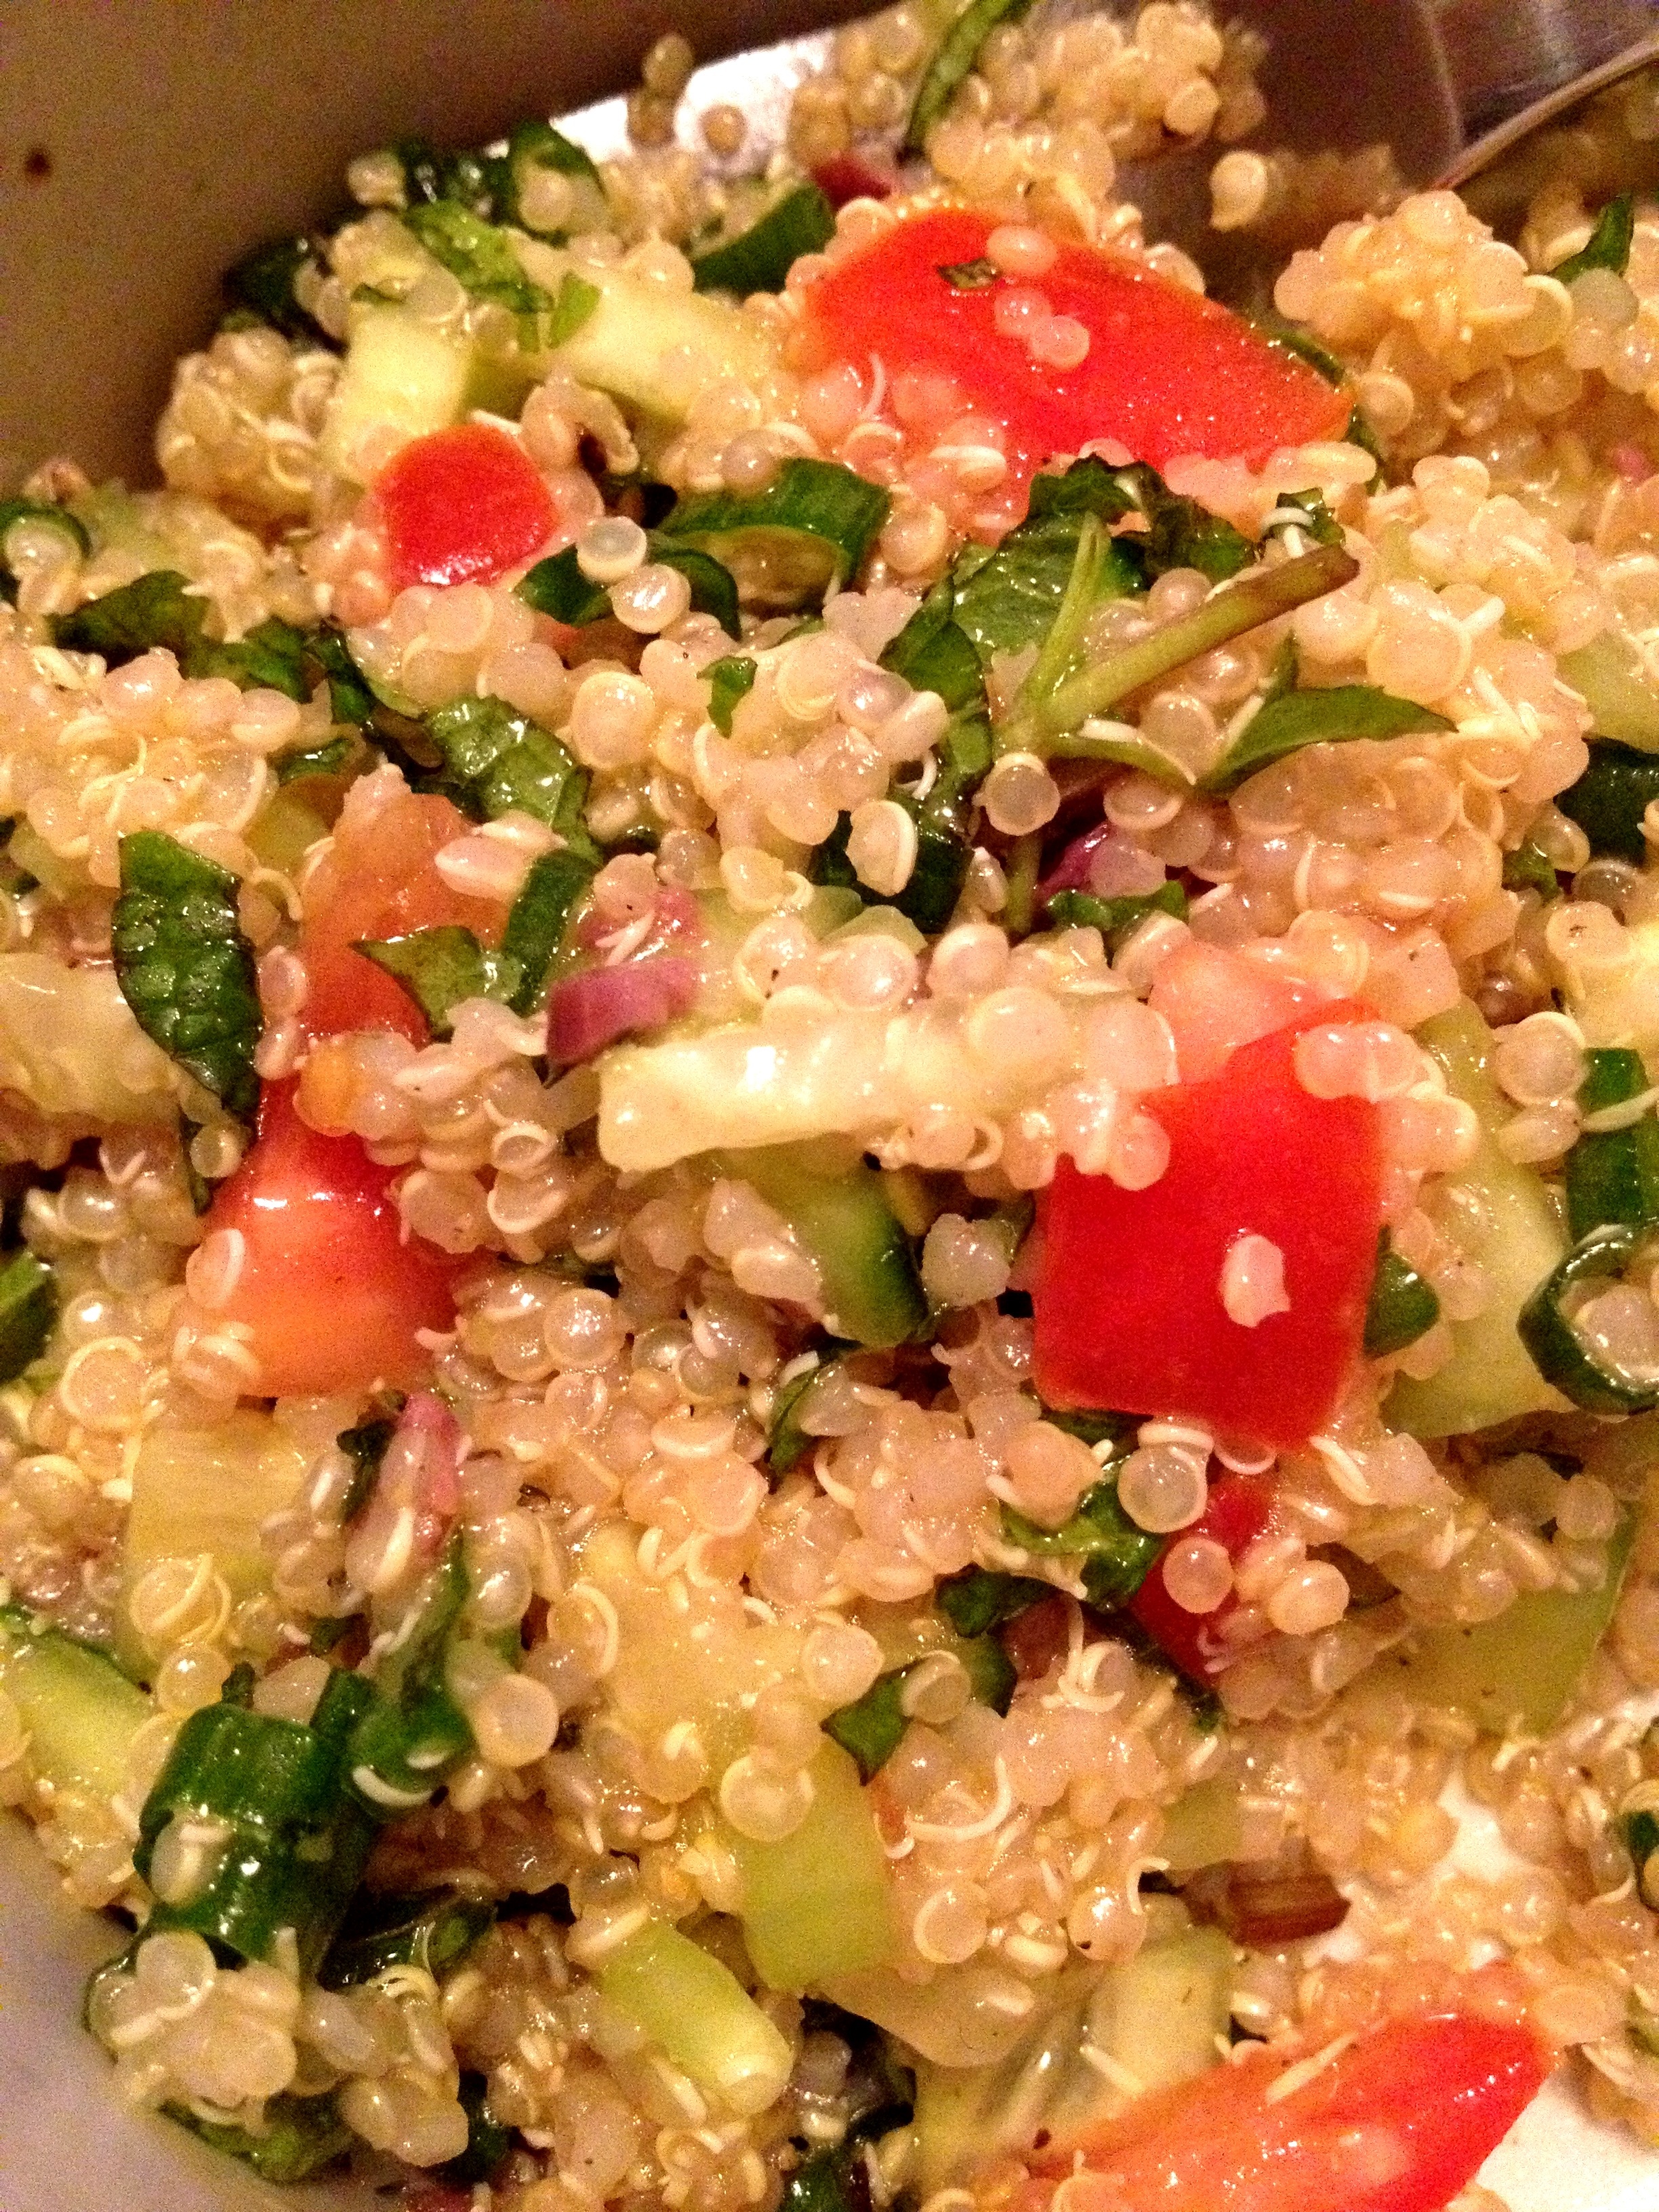
After having popovers at a local restaurant, I really wanted to try and make some of my own.  I stumbled upon this recipe for Yorkshire Puddings that are made in a normal muffin pan that have all the characteristics I love about popovers--in particular the fluffy, crispy, layers.  Made these a while back, but only just now go around to posting them.


Ingredients ~

1 cup flour 1 cup eggs 1 cup water/milk (50/50 split mixture) pinch of salt 1 tbsp malt vineagar


Instructions ~

(1) Mix flour, salt, eggs, and half the water/milk mixture.  Beat well until lumps are gone.

(2) Add the remaining water/milk mixture and vinegar and mix thoroughly.  Set aside

(3) Preheat oven to 400 degrees F.  Fill each reservoir of muffin tray 1/5 full with vegetable oil (or beef drippings as traditionally done.  I used vegetable oil).  Place tray in oven to heat up oil.

(4) Once the oil gets hot, take the tray out of the over and quickly pour some batter into each reservoir.  The batter should sizzle when it hits the oil, just like frying dough.  Place the tray in the oven for 25 mins.  Don't open door or they might collapse.

(5) After 25 mins, you can rotate the tray for even cooking and cook for another 10 mins or until golden brown.

Serve, eat, enjoy!


(image by: vivien chin)

Posted on February 12, 2012 and filed under recipes, restaurants & food.

baked asparagus omelet

A new breakfast favorite.  The sweet flavor of the asparagus, creamy cheeses, and delicious eggs make for a good combo.

Ingredients ~

1 pound pencil-thin asparagus, ends trimmed 3 ounces or more of favorite cheese (mix of Brie, Jarlsberg, Parmesan as seen above) 1 tablespoon unsalted butter 1 shallot, chopped 2 garlic cloves 5 large eggs 3/4 cup cream 1/2 teaspoon kosher salt 1/4 teaspoon black pepper


Instructions ~

(1)  Preheat Oven to 350 Degrees

(2)  Boil Asparagus until crisp tender.  Drain and pat dry

(3)  Cook shallots and garlic in butter until tender

(4)  Mix eggs, shallots, garlic, cheese and cream in bowl.

(5)  Place evenly the asparagus in a 9 inch quiche or pie pan.  Pour egg mixture over

(6)  Bake for 40 mins until puffy and golden or until egg is cooked through


(images by: vivien chin)

Posted on February 12, 2012 and filed under recipes, restaurants & food.

clam and asparagus risotto


Experimented with a new risotto by building off the recipe for a mushroom risotto that I typically make.  See my earlier post on Mushroom Risotto for the recipe.  Here are my additional alterations to that recipe to get what I made tonight. 


Ingredients:

No mushrooms or cheese used

Liquids used: (3 or 4) cups of chicken broth (or vegetable if you prefer); (1) cup vermouth; (1/2) cup clam juice drained from your clams

(1/2) lb. asparagus

(1) can of baby clams or (1-2) lb of fresh clams (steamed)

(1) tbsp of parsley [optional]


Directions:

_Cook asparagus in salted water for 2-3 minutes or until cook.  Cut into 1-2 inch pieces and pat dry with a paper towel.  Set aside.

_Drain the juice from a can of baby clams or steam your fresh clams and reserve the clam juice for later.

_Cook the shallots, garlic, and rice as in the other recipe.

_Add the vermouth as the first cup of liquid added to the rice .  From then on add the broth, making sure to incorporate the clam juice in as well.  You may not use all of the broth.  Continue to add broth until the risotto rice is to the firmness or softness of your liking.

_When rice is done add in the butter, clams, asparagus, and parsley (optional).  Mix together

_Add salt and pepper to taste


(image by: vivien chin)

Posted on February 20, 2010 and filed under recipes, restaurants & food.

olive tapenade


Made a nice olive tapenade for an appetizer tonight.  Very tasty and yummy.  I love olives and garlic.  I sort of just made up the recipe as I went along--making it to taste.  So here's my approximate recipe.  Feel free to change it up!


Ingredients:

(1/2) cup fresh olives [I went to the bins of fresh olives w/herbs in oil at the market for mine. Kalamata, green, etc)]

Juice from 1/2 a lemon

(1 or 2) tbsp capers [amount to your liking]

(3) cloves of garlic. Minced.

(1 or 2) tbsp olive oil

Black pepper to taste

(1) fresh Baguette [or crackers if you prefer that over bread)


Directions:

_Chop olives into relatively small pieces.  I liked mine a little coarse, but you can make a finer mince of the olives for a more delicate texture.

_Mince garlic into fine pieces.  (I love more garlic so I used 3 cloves, but you can use less if you like)

_Rough chop the capers

_Combine olives, capers, garlic, lemon juice, and olive oil.  Mix thoroughly and add pepper to taste.

_Slice up the baguette and serve the tapenade over the baguette (or crackers).


(image by: vivien chin)

Posted on February 20, 2010 and filed under recipes, restaurants & food.

coffee fudge w/ pecans

Tried making fudge for the first time last week!  Wanted to make my contribution to Kristin and Rick's Happy Hour Engagement party.  Everyone seemed to enjoy it, as did I.  The espresso really makes the chocolate have a nice coffee/mocha taste.  I love coffee flavor anything so I was drawn to this kind of fudge.  Found a recipe online and altered it a little to make it even more tasty.  Try it out sometime.

Ingredients:

_(3) cups semisweet chocolate [I used (3) 8 oz. boxes of Bakers brand semisweet chocolate and it worked just fine]

_(1) cup chopped pecans (or any nut of your choice)

_(1) 14 oz. can of sweetened condensed milk

_(2) tbsp. of brewed espresso [I used an Italian roast espresso, but any strong brewed coffee will work]

_(1) tsp. vanilla extract

Directions:

_Line a 8" x 8" pan with foil and butter the foil for easier removal of fudge from pan.  Set aside.

_Set up a double boiler on the stove by filling a pot halfway with water and bring water to a boil.  Place a metal mixing bowl on top of the boiling pot.  Add all the chocolate in.  Chocolate will begin to melt from the heat.  Keep stirring it as it melts. Double boiler set ups are great because it keeps the chocolate from burning.

_Once the chocolate is all melted add in the vanilla and espresso and stir.

_Pour the condensed milk in slowly at first just so the milk gets used to the temperature and then you can pour the rest all in.  Things start to set and thicken pretty fast once you add the milk in so work fast.  Add the pecans in right after you've poured in all the milk.  Mix until combined/smooth.

_Quickly pour the mixture into the pre-buttered pan.  Cover the pan and place in the fridge to set.  Should take a couple of hours to set.  (I just left mine over night because I didn't need it till the next morning.)

_Once set, remove the fudge from the pan and cut into chunks.  Fudge is so dense that a 1" x 1" cube is sufficient for a serving chunk size.  Depending on how long you leave the fudge in the fridge, it may be a little hard.  So you may want to let it sit out for a little a room temp to soften up (if you can even wait that long...haha...hard to resist the urge to just dig in).

_Enjoy!

(images taken with my phone so they didn't turn out too well, but it gives you a little preview)

Posted on January 29, 2010 and filed under recipes, restaurants & food.

golden beets & brussels sprouts

New recipe tried out for dinner last night that was really delicious and a must try!  I've never really eaten brussels sprouts before this and they are soooo good.  I'm going to have to make them more often.  The original recipe is from weheartfood but I made a few slight alterations to it so that's what I will include here, but you can check out weheartfood if you want the original recipe and portion size.  Next time I make this I'm going to try it with come green beans because they taste so good, but here goes with the original recipe:

Servings: 2-3 large portions

Ingredients:

(3) medium sized beets

(20) brussels sprouts

(1) shallot, peeled and diced

(2-3) gloves of garlic

(2-3) tbsp of toasted almond slivers

(1) tbsp fresh thyme chopped or (1) tsp dried thyme

olive oil

salt & pepper to taste

Directions:

_Heat oven to 350 degrees and place the beets in a pan.  Roast the beets in the oven for 1hr and 10 mins or until tender.  Remove from the oven and set aside to cool down for a few minutes.  When cool, peel the skin off and put them aside to be chopped later.

_Fill a skillet half way with water and bring to a boil.  Place the brussels sprouts in boiling water and cook for 2-3 mins or until almost cooked through.  Drain and set aside to cool

_Chopping time. If you haven't diced the shallots and garlic then do so.  Chop the beets into 1" or so chunks. Take the brussels sprouts and cut the stem off and then cut the sprouts in half (cut into quarters if you want them smaller).

_In a skillet, pour a little oil and saute the shallots on med or med/high heat until they are translucent.  Add in the garlic when the shallots look close to being done since the garlic doesn't take as long to get a little golden brown.

_When the shallots are done, add more olive oil (about 1-2 tbsp).  Add the brussels sprouts, beets, almonds, and thyme and mix everything together in the pan over med-high heat.  Add salt and pepper to taste.  Once thoroughly mixed (add more olive oil if you like), take off the heat and serve.

_You now have a delicious side dish or even main vegetarian course.  Very filling.

(image from weheartfood)

Posted on January 6, 2010 and filed under recipes, restaurants & food.

trick: vermouth_wine swap

noilly_prat A little trick I learned recently from Julia Child's cookbook that I have.  If you don't have white wine to cook with or don't know which one to pick, dry vermouth is a perfect substitute.  I tried this out with the mushroom risotto recipe I posted on an earlier posting and it worked PERFECTLY!  The risotto was delicious and flavorful!  I often forget to pick up the white wine when cooking risotto, but with this new vermouth substitute, it's easier to just buy a bottle and keep it in the cupboard.  For less than $10 it's a good choice that you can use to cook with serveral times before running out.  Chose to use the Noilly Prat brand of dry vermouth and it worked out well for me.  Tasty risotto.  YUM!

Posted on November 15, 2009 and filed under etc-, recipes.

kale chips

Kale chips 02

Delicious!!  A really easy snack recipe that I saw on thekitchn.com site.  They are really addictive and cheap.

Ingredients:

_(1) bunch of kale _olive oil _sea salt 

Preheat the oven to 350 degrees F.  Wash the kale very well and dry as completely as possible.  Choose more of the leafy, upper parts of the kale rather than the lower thick stalk part of the kale.  Tear the kale into smaller pieces and place in a oven-safe pan.  Try not to overlap too much.  Drizzle olive oil over the kale and sprinkle salt on top for flavor.  I like using sea salt preferably, but any salt you have around will do.  Place the pan in the oven for about 10 minutes or so depending on your desired crispiness.  Best eaten while they are still warm and out of the oven

I bake mine a little less than 10 minutes because I like the edges to be crispy and the middle to be still a little soft (shown above).  The below pic shows them more fully crispy.  I'll let you decide what you like best.

kale chips


(top image by: vivien chin) (bottom image from thekitchn.com)

Posted on September 28, 2009 and filed under recipes.

artichokes

artichoke Been on this artichoke kick lately and have been picking them up at the market whenever they are available.  My favorite way to have them is just simply steamed/boiled with mayonnaise on the side as a dipping sauce.  So delicious! 

A little tip that really works.  After you cut off the sharp tips/top of the artichoke leaves, rub some lemon juice on the cut ends and squeeze some on the whole artichoke to keep it from discoloring while cooking.  Then you can go ahead and drop it in boiling water or in your steamer.  Made the artichoke very tasty as well. yum!

Posted on September 1, 2009 and filed under recipes, restaurants & food.

banana bread

banana bread Woke up this morning and decided to make banana bread.  Haven't made it in a LONG time, but when I do it's always soooo good.  As you can see, I couldn't even wait until it cooled down before trying to cut into it and grab a corner bite.  Can't wait to devour it.  yum...

the recipe will remain secret for now....:)

(image by: vivien chin)

Posted on August 8, 2009 and filed under recipes, restaurants & food.

#52 with a twist

endive Tried simple salad #52 from the 101 simple salad list that I mentioned in an earlier post "101 salads", but I made a modification.  I basically just made my usual egg salad recipe that I make to taste (so no measuring really) with hard boiled egg, mayo, paprika, garlic powder, sea salt, and pepper.  Spooned this salad mix into the endive leaves.  It was simply delicious and appetizing.  Afterwords I stumbled upon this other recipe for an endive salad with blue cheese, candied pecans, and a dijon vinaigrette that looked and sounded delicious.  Will report back when I give it a try.  My new love is the endive.  Light and crisp.  yum...

Posted on August 8, 2009 and filed under recipes.

butternut squash lasagna

butternut squash lasagna

Made this delicious Butternut Squash Lasagna yesterday.  It was sooo amazing! My mouth is watering just thinking about it.  Very easy to make just takes some prep time. (Thanks Kristin for the find!)  The recipe is one that I adapted from the William's Sonoma Skillet Lasagna Recipe.  My instructions below are for making the lasagna in a glass bread pan sized dish (about 2.5 large servings), so just double the recipe if you need to make more.

Ingredients: (servings = 2.5 large servings)

_olive oil, to cook with _1/2 yellow onion, diced _2 garlic cloves, minced (I like garlic so I added more than this) _salt & pepper to taste _1/2 lb Italian sausage, casings removed (Sweet sausage is what I used and it was great!) _2 tbs unsalted butter _1/8 cup all purpose flour _1.5 cups milk _1/2 cup grated Parmigiano-Reggiano cheese (I used 1 cup because I wanted it cheesy) _1/8 cup flat leaf parsley minced, fresh _1/2 tbs sage minced, fresh _5 sheets or so of lasagna noodles, cooked al dente _1.5 lbs of Butternut Squash, peeled and sliced into wide sheets.

Instructions:

(1)  Preheat oven to 400 degrees F.

(2)  Cook lasagna noodles until al dente and set aside for assembly later.

(3)  In non-stick frying pan, heat olive oil.  Cook onions until soft and translucent on med-high heat (about 8 mins or so).  Add garlic, salt, and pepper to taste and cook for another 30 secs.  Set onion/garlic mix aside in a bowl.

(4)  Cook sausage (casings removed) in frying pan, breaking them up into pieces while cooking.  Cook until brown and cooked through.  About 8 mins.  When cooked, add sausage to onion/garlic and mix together.

(5)  In frying pan, melt butter over medium heat.  Add flour and cook, stirring constantly for 1 minute.  Slowly stir in milk and increase heat to med-high.  Cook until thickened, 8-10 mins approx.  Turn heat off after thickened and add parsley, sage, and 3/4 of the cheese (leaving the rest for topping).  Salt and pepper to taste.

(6)  Lasagna assembly.  Pour a portion of the sauce to cover the bottom of the glass bread loaf pan (or baking container you are using).  Put a layer of lasagna noodles to cover sauce (I had to cut the noodles into smaller pieces to make it easier to layer in the bread pan).  Add another layer of sauce, then sausage, and a layer of squash.  Add another layer of noodle to cover the squash.  Repeat the sauce, sausage, squash, noodle layering until you reach the top of the pan, making sure to end with sauce on top.  Sprinkle remaining cheese on top.

(7)  Bake pan of lasagna in oven until brown and bubbly on top.  Approximately 45 mins, but check every so often as each oven is different.  When done, set lasagna out to cool for 15 minutes before serving.  Top with parsley if you like.

Enjoy!

(image from Sarah's Cooking Blog)

Posted on July 20, 2009 and filed under recipes.

chex mix!

chexmix Craving Chex Mix so I just made some right now.  The recipe below is for the Original Chex Mix that is found on the Chex cereal boxes usually.  My favorite part of Chex Mix is just the cereal so I usually make it with just Corn Chex for myself and mix in extra garlic powder after the seasoning mixture is stirred in because I like mine extra garlicky!

Ingredients:

3 cups Corn Chex 3 cups Rice Chex 3 cups Wheat Chex 1 cup mixed nuts 1 cup bite size pretzels 1 cup garlic bite size bagel chips 6 tbs butter 2 tbs Worcestershire sauce 1.5 tsp seasoned salt 3/4 garlic powder 1/2 tsp onion powder

Instructions:

(1)  In large microwave bowl, mix cereal, nuts, pretzels and bagel chips. 

(2)  In a small microwave bowl melt the butter uncovered on High for about 40 seconds or until melted.  Stir in seasonings. Pour over ceral mix and stir until coated.  (I find it helps to evenly coat the cereal if you spoon small amounts of the butter mix, mix a little, and repeat)

(3)  Microwave uncovered on High for 5-6 minutes, stirring every 2 minutes.  (I only really heat it for 2 mins or so because my microwave is very hot and burned/ruined my Chex Mix the first time I ever tired to make it.  You may have to figure out yourself the best amount of heating time is for your microwave.)

(4)  Spread out on a tray or paper towel to cool.  (I don't really wait for them to cool completely because I usually want to snack immediately...haha)

Posted on April 23, 2009 and filed under recipes.

orzo salad

orzo-salad There used to be a restaurant around Union Square called Barocco that served this really tasty orzo salad that I liked.  It inspired me to go and make my own, but I added a few more things to the mix that I thought would be good additions.  The salad is Mediterranean in taste.  The recipe makes a lot, so there's leftovers for the next day too which is always a plus!  Since I just sort of guessed on how much to put in I don't have too many exact measurements (I make it to taste basically), but you can't really mess it up too much.  Just keep adding things accordingly to the proportions that you would like.  For example, I love olives so I'm not opposed to adding a ton to the mix.  Here's a good starting point for you to try:

Ingredients:

3/4 lb of orzo (or 1lb. if you want to just use the whole box of orzo) olive oil 1 sweet red bell pepper (large) 1 avocado 1 bunch of green onions 1/2 cup of kalamata olives 1/2 package of baby spinach salad feta cheese sea salt pepper


Instructions:

(1)   Boil the orzo pasta 'til al dente.  It cooks pretty fast, so keep an eye on it.  When it's done, drain the pasta, and place in a large mixing bowl.

(2)  Chop and dice the red pepper, avocado, olives, green onion, and spinach leaves

(3)  In the mixing bowl, mix in some olive oil to lightly coat the pasta and a little sea salt (you can add more salt later if needed after adding the olives and tasting so as not to over salt). 

(4)  Then mix in the red pepper, avocado, olives, green onion, and spinach. 

(5)  Add more olive oil, salt and pepper to taste if needed.  Add feta cheese to your liking.

Posted on April 20, 2009 and filed under recipes.

mushroom risotto

mushroom_risotto4 Had dinner one night at my friend Kelly's and she made the most delicious mushroom risotto that I had to go home and try to make one myself.  I found the recipe on at www.allrecipes.com under the entry "Gourmet Mushroom Risotto".  I've made it several times already and passed it along to other people (Alison has tried it and said it was very yummy!).  Takes a LOT of stirring, but it is well worth it. This recipe makes a good amount for 2 people to have as a meal or for 1 person with leftovers.  It's sooo tasty that you'll find it hard have leftovers tho--atleast that's how I feel when I make it :).  I have also made it without the white wine (which is probably a sin) because I didn't have any around and it still turned out delicious.  So just a thought for you all if you don't have white wine around, but still want risotto.  Here's the recipe (with a few small changes I made--mainly just the addition of garlic) Enjoy!


Prep + Cook Time = little under an hour

Ingredients:

4 cups chicken broth 3 tbs olive oil 11-12 oz. portobello mushrooms (or any of your choice), thinly sliced 2 shallots diced 1 cup Arborio rice 1/3 cup dry white wine sea salt to taste black pepper to taste 2 tbs finely chopped chives 2 tbs and 2 tsp butter 4 tbs freshly grated Parmesan cheese

  Directions:

(1) In a saucepan, warm the broth over low heat

(2) Warm 2 tbs. olive oil in a large saucepan over medium-high heat.   Stir in mushrooms and cook until soft, about 3 mins.  Remove mushrooms and their liquid, and set aside.

(3) Add 1 tbs olive oil to a skillet and stir in shallots and garlic.  Cook for 1 minute.  Add rice, stirring to coat with oil, about 2 minutes.  When the rice has taken on a pale, golden color, pour in wine, stirring constantly until wine is fully absorbed.  Add 1/2 cup broth to the rice and stir until broth is absorbed.  Continue adding broth 1/2 cup at a time, stirring continuously, until broth is absorbed and rice is al dente, about 15-20 minutes.

(4) Remove from heat and stir in mushrooms and liquid, butter, chives, and parmesan.  Season with salt and pepper.

Posted on April 12, 2009 and filed under recipes.